Прохождение игры nevermind. Прохождение Nevermind
Если у вас возникают проблемы при прохождении игры Nevermind , вы всегда можете воспользоваться нашими советами и информацией к действию. Мы подробно описываем шаги, которые необходимо проделать, чтобы полностью пройти игру Nevermind . В наиболее сложных местах мы добавляем картинки, которые могут вам помочь. Прохождение Nevermind читайте у нас на сайте.
Cуть всей игры заключается в том, что вы должны будете посетить подсознание трех людей и выяснить причину их психического заболевания. Вам придется ходить по фантазиям своего пациента, решать головоломки и находить картинки-воспоминания, которые потом нужно будет выложить в полноценное событие. Зайдите в здание, взаимодействуйте с терминалом, которые будет справа от вас чуть-чуть впереди. Введите свои врачебные данные. Потом идите налево, поверните направо. Посетите свой кабинет. Взаимодействуйте со телевизором на стенке, запустите первую симуляцию.
Пациент #1
Заходите в комнату, смотрите ролик, в нем пройдите процесс симуляции и послушайте рассказ вашего пациента. Вы окажитесь в главном зале, прочитайте все пометки. С их помощью вы полностью поймете и узнаете место, где находитесь. Зайдите в третью дверь справа. Вы переместитесь в первое воспоминание своего клиента. Возьмите первую картину, в ней будет рассказано о спасении главного героя сестрой. Идите по тропинке прямо, дойдите до первой головоломки. Поставьте камни определенных цветов на те статуэтки, у которых глаза совпадают с цветом. Получите еще одну картину, в которой речь идет о птичках. Продолжайте свой путь в лесу, идите прямо за хлебом и не реагируйте на куклы. Получите еще одну картину, а потом вернитесь в главный зал, сделайте перерыв.
Зайдите через знакомую дверь во второй раз, теперь вы попадете в новое воспоминание пациента. Идите по тропинке. Положите хлеб на тотэм. Вернитесь назад и снова повторите действие. Совершайте действие с хлебом 6 раз, получите в подарок еще одну картину. Потом попытайтесь покинуть локацию, вы встретите мост. Идите через него. Подберите картину, которая находится на дереве. Потом вы окажитесь в конфетном лесу, снова получите в свои руки картину. Идите прямо, вы встретите домик из конфет. Зайдите в него. Тихо и медленно двигайтесь по полу, опасайтесь кольев. Подойдите к печке, откройте её и возьмите картину. Дверь в печке закроется, начнется ролик, в нем вы будете падать вниз. Остановитесь. Вы увидите лодку, садитесь в неё и плывите к выходу. Возьмите последнюю картину, пройдите в последний зал. Теперь вам нужно правильно поставить пять картин, чтобы открыть тайное воспоминание пациента и решить его проблему: Мать ненавидела детей, она отвела их в лес, потом дети нашли выход из леса и встретили конфетный домик, в нем ведьма напала на детей, но сестра спасла брата.
Пациент #2
Загрузите воспоминание второй пациентки. У неё в детстве умер отец в аварии, у девушки начались кошмары и вы должны ей помочь. Главный зал будет находиться на улице на детской площадке. Возьмите сразу рядом с деревом первую картину. Зайдите в дом через вторую дверь слева. Идите по коридору до лестницы, поднимайтесь наверх. Поставьте все чашки на свои места, получите картину в столике. Выключите свет, чтобы сделать комнату более кровавой и мрачной. Подойдите к сейфу. Наберите в нем: молоко, пистолет и печаль. Возьмите в руки еще одну картину и возвращайтесь обратно вниз в коридор.
Зайдите на кухню. Подойдите к холодильнику, на кровавых следах есть буквы и поставьте их в правильном порядке при помощи магнитиков. Откройте холодильник, получите в руки очередную картину. Идите в морозильник, следуйте через тела, доберитесь до конца комнаты, в виде бонуса получайте снова картину. Вернитесь в коридор, постучите в душевую, а потом зайдите в третью неисследованную комнату. Соберите в ней мозаику, снова картина в ваших руках. Вернитесь во двор, зайдите в гараж. Перейдите дорогу, возьмите картину, а потом вас собьет машина. Двигайтесь через фонари, соберите полную картину. Возвращайтесь в главный зал, зайдите в похоронную комнату. Пройдите через скамейки, подойдите к гробу. Поставьте все стаканы на аппарат, гроб поднимется, возьмите картину. Теперь вы можете собрать полную историю: девочка играла во дворе, захотела попить молока, разлила его, поднялась к отцу и увидела, как он покончил жизнь самоубийством.
Пациент #3
Настает момент изучения последнего вашего пациента. Ролики с его участием очень кровавые и тяжелые, поэтому часто делайте перерывы, чтобы не получить расстройство психики. Ищите в городе в мусорках банки, обменивайте их на монетки в специальных аппаратах. Киньте монетки в фонтан, смотрите ролик. Сменилась погода, идите по левой стороне улицы, осмотрите стенд со знаками. Поправьте их всех и поставьте правильно. Возьмите картину, спускайтесь в подвал. Пароль от двери - 365. Вы снова оказались на улице, зайдите в мотель. Найдите картину, встаньте в неё глаз, который лежит на полу. Пройдите в дверь, осмотрите ванную и возьмите еще одну картину.
Теперь ищите панель рядом с лифтом на одном из этажей. Взаимодействуйте с ней, сделайте все кнопки зелеными. Возьмите картину, спускайтесь на лифте вниз и смотрите кровавую сцену. Вы вернулись на улицу, идите прямо, возьмите ножик из мусорки. Идите направо, найдите труп и вставьте в его руку ножик. Получите билет на карнавал. Отдайте билет, получите карту и зайдите на карнавал. Снова сдайте банки, монетки киньте в аппарат с волшебником. Смотрите ролик, вернитесь на карнавал и киньте еще монетки. Все покроется кровью. Осмотрите землю, найдите последнюю картину. Постройте картину событий: парень хотел спасти мир, скажите что нужно все уничтожать и мир необычный, иногда вас кидали, но все в итоге кончалось хорошо. Смотрите последнюю сцену. На этом прохождение игры заканчивается.
IntroSim
You"ll start off in a hallway, which you can follow around. There will be a computer terminal on your right that you can interact with to register yourself. After completing registration, you"ll unlock:
Continue onwards, you"ll soon come to a door that opens to a room which contains a terminal attached to the wall. Approach the terminal and enter the "IntroSim" level.
Note: For the sake of fluidity, I will be listing the memories in the initial walkthrough. You won"t be able to obtain these collectibles until you complete the level and replay the level by selecting "Advanced" mode. Just go through the objectives the first time, picking up the memories on your next replay in "Advanced".
Enter the chamber on the right, going into the room as it loads the memory. You"ll step out into a fantastical land, the story of Hansel & Gretel. Walk directly down the path in front of you, examining the wooden boat on the ground for Memory 1/11 . Continue down the path, picking up the painting from behind the rocking horse before examining the sign on the door for Memory 2/11 . Turn around and go down the left path, picking up the painting from the ground here. This opens a door on the right, proceed through it and open the next door at the end of the hall. Directly ahead of you is another painting, grab it and proceed down the path until you see a carving of 3 birds on the left. Interact it them, starting by moving the blue rock on the right into the mouth of the center bird. Take the purple stone on the left and give it to the bird on the right, then move the white stone on the right to the birds mouth on the left. This will unlock the tree branches ahead of you and allow you to collect another painting. Turn around and open the door, following the path until you come to the baby doll tree. Go down the right path here, examining the doll head with a knife in it lying next to the tree on the left for Memory 3/11 . Follow the path around and pick up the very obvious painting on the right. Take the left path in the next area, going through both doors and returning to the starting area.
Make a right here, going past the large bulletin board in the center and through the opened door on the right wall. Follow this path until you come to an owl statue on the left. Pick up the bread from the ground and place it on the plate in front of the owl. Turn around and come back the way you came, walking over the bridge and making a right at the rocking horse. Navigate this path as it curves left, examining the piano on the ground for Memory 4/11 . Turn around again and make a right at the rocking horse, following the path as it twists around to the right for another piece of bread and a statue. Place the bread and turn around, following the path through a tunnel and coming to another statue on the left. Place the bread here again for a change of temperature. Turn around and follow the path down, making a right at the headless statue for more bread and other another plate. Turn around and go left, moving past the stoves until you come to a wooden bridge. take the painting from the post next to the bridge before moving left, descending down the hill and going right to find a skull (Memory 5/11 ) under the bridge. Continue down this path, going over the bridge to the left to come across a shed which counts as Memory 6/11 . Return across the bridge, past the skull, up the hill, and across the bridge up here. Make a right when you can, following the next bridge. Take a left onto the next bridge, then turn left and take the painting before crossing the next bridge. Follow the bridges as they turn slightly left, making a right up the hill once they end to find a cupcake on the ground. Examine it to find a heart underneath the wrapping, which is Memory 7/11 . Continue left, following the path and the lamp posts until you reach a large, pinkish tree. There"s an axe embedded in the right side of the tree, examine it for Memory 8/11 . You"ll see the gingerbread house in front of you, navigate around the left side of it to collect the feather from the rock for Memory 9/11 . Move to the path leading up to the house, picking up the painting from the first huge cookie in front of the door. Enter the house, getting ready to do some dodging. Candy cane spikes come up from the floor, which can damage you. As long as you don"t get stuck, you can maneuver through them before dying. There"s a large cookie in a cage on the right, look at them for Memory 10/11 before moving cross to the left side of the room, looking at the large ham on the table for Memory 11/11 . Examine the oven, taking the painting once you"re inside. A hand will occasionally pop out of the wall as you slide down the oven, look to it to be grabbed out and saved.
In this next area, pick up the painting from the dock in front of you. Sit on the both as you drift down the water (if you want to play another indie walking sim that explains the Hansel & Gretel story to you as you drift along in a boat, I recommend ) and go up the ramp once you reach the end. Opening the door will bring you back to the starting area, with a painting in front of you on a piano. Make your way to the center of the area again, examining the large billboard this time. It is now your job to sort the paintings you collected in order of factual events. The first one is the 2nd from the left on the top row, "My stepmother hated my sister and me". This is followed by the 2nd left on the bottom row, "She would take us to the forest to die". The 3rd is the farthest right on the bottom, "We were lost but found a house". The first on the bottom left is the next piece, "The house was a trap!". The last one is on the top row, middle picture. "My sister saved me from becoming dinner". This will successfully end the simulation. giving you:
Now restart the level, selecting "Advanced" this time. Follow the above guide again, this time picking up everything I marked as a memory. After going through the level a 2nd time and getting all 11 memories, you"ll unlock all of the following:
#251
With IntroSim complete, it"s time to move onto an actual client. Start up the probe for Client #251 on your office terminal. Go through the door into the chamber once again, walking out into suburbia. Move straight ahead and pick up the painting from the ground as well as examining the teddy bear near the tree for Memory 1/14 . Turn around and find the open blue door, walk to it and look up at the letter in the box with the "Past Due" notice for Memory 2/14 . Proceed into the house and through the door at the end of the hall, turning left and looking at the puzzle box on the bottom shelf for Memory 3/14 . Leave this room and go right, going through the blue door at the end of the hall. Continue up the stairs and through the door at the top, going to the left slightly and up to the shelf next to the dresser. Look at the records next to the safe for Memory 4/14 , then turn around and examine the switch on the lamp for a bang. There are 3 cups on the floor of this room, pick up all 3 and place them on the cupholder on the drawers in front of the bed. This will pop open the bottom drawer for a painting, pick it up. Turn around and go back to where the records were, examining the safe on the left and interacting with the combination. The proper code is "Milk, Gun, Sorrow". Inputting it will open the safe and reveal another painting for you to pick up, grab it and head back down the twisting stairs you came up into this room from. Go through the door at the bottom and pick up the painting from the floor right in front of you. Enter the door on the left, being wary of the statue heads in this room. Make your way around the center and edges of this room averting their gaze and collecting 8 puzzle pieces from the floor. Directly to the right of the door you entered from is a black Knight chess piece on the floor, just past the puzzle piece propped up next to the plant. Examine the knight for Memory 5/14 . Go up to the puzzle on the table and solve it (it"s incredibly easy) before turning back around and picking up the painting from the pillar. Leave this room and go right again, taking the green door on the right at the end of the hall. In the kitchen, look at the clock on the wall ahead of you for Memory 6/14 . Check the burning meat in the stove for another painting before turning back around and examining the fridge magnets. Rearrange them to spell out "Bathe in Woes" (WITH MY WOES) to open the door to the fridge. Enter the maze and proceed left, moving until you find the leftmost wall and a row of bodybags hanging from the ceiling. Move past the corpses and look to the right for the bodybag on the floor for Memory 7/14 . Turn around and head back, leaving this small crevice and looking to the floor for a trail of milk on the floor. Follow this trail as it leads to the right side of the room, moving through the bodybags and eventually coming to an open space full of corpses. Walk to the back left of the room and pick up the painting from the top of the bloody milk carton. This will remove the shelf maze, allowing you to walk straight across the bodies to exit the fridge without hindrance. Leave the kitchen and go left down the hall, turning right and exiting from the blue front door you first entered from.
Turn right and go past the billboard tree here, into the garage at the end of the street. Look to the right for another past due notice, which counts as Memory 8/14 . Interact with the garage door to open it, preparing yourself for a bit of Frogger. Move across the street, dodging the cars as they come at you. After passing 2 cars, you"ll be in a middle grassy area of safety. Pass 2 more cars in this manner, ending up on the other side of the street. Before interacting with the wrecked car, move right and go all the way to the end of the street. Check the graffiti that says "Figure it Out" on the wall next to where the cars are coming from for Memory 9/14 . Return to the wrecked car for a painting and teleportation into a spooky car realm. Proceed straight, following the painting. Continue straight instead of left, following the path all the way until the scene with the father in the car. Continue on, taking the next 3 right turns that you see. After the 3rd right, continue straight up the slope, taking the next 4 rights until you see the car scene yet again. Keep going, taking the next 2 left turns when you can. Upon reaching the bottom of a slope after the 2nd left, go right instead. Take the next 4 lefts you can, which will end with you staring at a large gun. This gun is Memory 10/14 , which you can turn around from and make a right from after it counts. Take the next left you can and then a sharp right, leading to another car scene. After this final scene, walk straight and pick up the painting from the middle of the creepiest room in the game. Go right and through the open mouth, opening the garage door to be out back in the center area.
Walk straight ahead and under the tire swing, moving past the fence on the right and through the red door. Take another twisting staircase down, opening the door at the end into the church. Go to the right wall and hug it as you move forward, timing your movements to avoid the sliding pews. Once you reach the end, turn around and look under the pew right next to you for the word "Remember", Memory 11/14 . Ascend the steps and look into the casket for the words "Look at Me", this will be Memory 12/14 . Go to the left and pick up the teacups on the ground here. Place one on every other stand on the largest sunflower eye, the one furthest right. Do the same for the middle one, and place one on every stand for the smallest left sunflower. As they start to spin, walk over to the left and examine the daisies on the ground for Memory 13/14 . Retrieve the painting from the open casket, descending the steps behind you once again. Go to the right and check the base of the staircase for "They Know", giving you Memory 14/14 and finishing them for this chapter. Leave the church the way you entered, no longer worrying about the pews. Approach the billboard near the tree for another puzzle. The first picture is the first one on the top left, "Me having a tea party". The second is the first one on the bottom left, "Me trying to pour some milk". Thirdly, choose the middle picture on the bottom row, "Me going upstairs". The 4th is bottom row, far right, "What is daddy eating?" (it"s his gun). The last picture is the 2nd from the right on the bottom row, simply captioned "..." and will end the level, granting you:
Once again, choose Client #251 as "Advanced" and pick up all the memories mentioned above. Doing so will unlock the following for you:
#418
Select #418 and enter your chamber once again. The scene this time is an urban cityscape, so start off by heading down the street to the left. Examine inside the garbage cans until you find a can. Pick the can up and move around the streets, finding a can redemption machine on the left side of the street. Put the can into the machine to receive a coin, which you can turn around and flip into the fountain. Go down the alley to the left and open the garbage cans, looking for a rat. If it"s not here, go around the map and look in other cans for it. The rat is Memory 1/13 . Open the remaining cans until you find more cans, take one to the machine for another coin to toss into the fountain. Find one more can for the machine, throw one more coin into the fountain for a change of scenery. Walk up the hill again, going right and picking up the painting from the barricade. Turn around and follow the street as it turns right, going all the way to the end for another painting under the sign. Go into the alley on the left and look at the "Come Down" written on the left wall for Memory 2/13 . Turn left and examine the barrier in front of the stairs. The puzzle here is to interact with each sign until it"s facing rightside up. After straightening out all the signs, go down the stairs and through the door on the left. Go left again and examine the control panel on the wall. The code to enter is 536, opening the door in front of you. Pick up the painting from the floor and take the pills from the mannequin hands to your right to put you back in the starting area.
Move to the top of the hill again, turning left and picking up the painting from the streetlight. Continue down the street on the right, picking up the painting from the left side as you pass it. Continue down the street, looking down to see a flower blooming through the asphalt for Memory 3/13 . Look to the left and examine the broken sign where the puzzle was earlier for Memory 4/13 . Return to where the painting was a few seconds ago, entering the double doors to the hotel to the right. Proceed through the next few hallways to enter the lobby, going to the left and checking the painting on the wall above the piano for Memory 5/13 . Go all the way up the stairs on the right, climbing all the way to the top and examining the ghost to the left for Memory 6/13 . Go down 4 flights. moving right around the balcony to find a swirly circle on a nightstand. Pick it up and bring it to the other side of the balcony, inserting it into the painting on the wall. This opens a door to the left, so proceed through it and follow the twisting hallway to the next room. Grab the painting from the tub on the right, transporting you to a very sp00ky room. Go down a flight of stairs and make your way fully around the balcony before going up 2 flights. interacting with the elevator control panel on the wall. This puzzle turns changes the lights directly around the button you press. The key is to change every light to green, which is rather easy. Once you do it, the elevator opens up. Go into it and pick up the painting from the back wall, dropping down the elevator shaft. After the fall, turn around and collect another painting. When the door opens, move ahead and and collect another painting from the ground at the feet of the mannequin circle. This will open the pill box in the center of them, interact with it to be transported again.
Back here, go down the left street. Go to the end and proceed down the left alley, looking at the right wall next to the dumpster for Memory 7/13 . Examine the garbage cans here, as well as in the alley across from you until you find a mannequin head (Memory 8/13 ) or ammunition (Memory 9/13 ). Leave the alley and go down the street to the left, looking under the slide by the rocket ship to find a foot, which is Memory 10/13 . Go back down the street and into the alley on the left, looking in the garbage cans for the mannequin head or ammo. Continue going around through the cans until you find a box with a red cross on it, open it up and retrieve the knife contained within. Take this knife to the right street, placing it in the hand of the mannequin on the ground to get a coin from its mouth. Take the coin across the street, placing it in the ticket booth on the right to open the door to the carnival. Go through the open door and twisting hallway to find yourself in the carnival.
Make a right in here, following the area to an open tent on the right. Go inside and find the alcoholic mannequin for Memory 11/13 . Leave the tent and walk into the center area, going right to pick up the painting from the feet of the fortune teller. Go left to the roller coaster, going left down the wooden boarding area until the scenery changes. Once it does, make your way back to the center carousel while avoiding the wooden dummies with the target on their faces. Walk around the carousel until you find the white mannequin you stabbed through the hand, giving you Memory 12/13 . Turn around and go to the Shooting Gallery, picking up the doll in the booth on the left for Memory 13/13 . Turn around and make your way to the fortune teller again, picking up the cans slightly behind the stall and bringing them to the can redemption machine behind it. Each can drops a coin you must bring back to the fortune teller. Do this 3 times total to get an explosion which covers the entire area in flesh. Turn around and go straight, back to where you first entered to find a painting on the ground. Picking this up transports you back to the starting room, where you can turn around and solve the puzzle. The first memory is going to be the bottom one on the far right, "I was a warrior". Next up is 2nd picture from the right on the top row, "Sometimes to protect something you love". Third is 2nd from the left on the top row, "Sometimes you lose track". This is followed by the far right picture on the top, "Self-loathing and distrust". 2nd from the let on the bottom is last, "They sang the song". This will end this level and get you:
Same drill as before, do the client again in "Advanced" to earn:
#440
Choose client #440 next, stepping into the chamber once again to find yourself in a large hall. Approach the brain in the middle of the room for Memory 1/10 . Turn around from the brain from The Evil Within making a cameo and enter the door behind you, checking the poster on the wall to the left for Memory 2/10 . Head down to the end of the hallway and through the door, examining the piano on the stage. Even if you play perfectly, you"ll still eventually fail out of this section so just mash the keys until you get transported to the metronome desert. Go left until you see an hourglass, dodge the hand of the metronome and make a right, picking up the painting from this area between the metronomes. Continue down here, dodging the other metronome to the left as you approach the hourglass for Memory 3/10 . Continue left and up between the metronomes to find another hourglass, approaching it for Memory 4/10 . Move straight, past the series of metronomes ahead of you until a blue one appears in front of you. Once it does, head right and collect the painting from the ground. Move around the metronome on the left and enter the door on the side of the blue metronome to return to the starting room.
Enter the right door in here, with the red light next to it. Follow this hallway all the way to the end, looking to the right in order to get Memory 5/10 next to the painting on the music stand. Collect the painting and head through the door for an interesting puzzle. Approach the cello and interact with it to "play". The first string to hit is the 2nd from the right, underneath the bottom hand. 2nd string will be 2nd from the left between the 2 hands, last will be the furthest to the right above both hands. Go into the next room and interact with the French horn. First valve lever to hit is the bottom one, followed by the 2nd from the top, then the top, and finally the 2nd from the bottom. After this, go into the next room and interact with the harp. First string to pluck is the furthest on the left, then the 3rd from the left, 4th from the left, 2nd from the left, 5th from the left. Enter the final room and interact with the drums. The first is the floor tom (bottom right), followed by the 2nd rack tom (center right), snare 1 (bottom left), snare 2 (top left), chimes (top right) and ending with the last rack tom (center left). Enter the final puzzle room and interact with the skin flute to start the last puzzle. For this I"ll split the answer into top and bottom, the green skin being the center that divides them into 5 equal pieces. I will be counting down, so if I put bottom 5, that means it"s the bottom-most hole. The solution is bottom 5, bottom 1, top 4, bottom 3, top 3, bottom 4, bottom 2. This unlocks the door and leads you into the next hallway. Go left here, taking the painting from the music stand before turning around and going down the door at the end of the hallway. This will lead you into another large concert hall, make your way past the seats and up to the piano. The chalkboard above the piano shows you where the notes are, so follow that and play FCDAEGBEDGCAF on the piano for Memory 6/10 . Even after completing it properly, the section won"t end and you"ll have to play more incorrect notes in order to be transported once again.
Back in the starting room, turn around and enter the green door behind you. Follow this hallway all the way to the end, collecting the painting on the ground in front of the next door. Proceed through this door and up to the photographs on the right for Memory 7/10 . Look left to the piano, checking the sign above it for Memory 8/10 . Open the cover to the keys and take the painting from within, waiting for the room to fill with blood before being moved again. Once in the land of the hands, move to the right and walk up to the green hand coming from the ground on the left for Memory 9/10 . Move ahead and keep right, looking for a small path here. Follow it around to find a painting on a fist, take it before turning around and going back onto the main path. Stick to this path as it curves, stopping when you see a large, grasping hand in the dead center of the path. Look left and walk down this alcove to retrieve another painting before turning back to the main path. Stick to this path as it goes left and up, looking to the right and checking out the blood pouring down for Memory 10/10 . Follow the path as it crosses over an outstretched green hand, going through the door at the end of it. Once through, you"ll be back in the main room. Go through the center door behind you once again, following it to the end of the hall for a painting and another concert. Sit down and wait for the orchestra to play, then follow the fingerprints on the keys. Once you do, you"ll be rewarded with applause. Go back the way you came, picking up the painting to the left of the door before going through it and to the end of the hall. Time to solve the memories, so approach the board and start off with the 2nd pic from the left on the top row, "My parents hired a famous piano teacher". Next up is the far right picture on the bottom row, "He had high expectations for me". 3rd picture is the bottom row, far left "I once made a painful mistake". Next up is the middle picture in the top row, "He always taught me to fear failure". Last we have the 2nd from the left on the bottom, "Constant perfection allowed me to be a celebrated pianist". This will end this client and get you:
Completing it as usual on "Advanced" gives you the 10 memories you collected as well as:
#909
Select your patient and enter the chamber once again to end up on an alien world. Go right to the stairs, picking up the painting from the first step before proceeding up and through the door. Go down this hallway and exit into a bedroom, immediately look at the book on the dresser to the left for Memory 1/10 . This room also has 2 cases on the walls with paper dolls in them, look at these for Memories 2-3/10 . Leave this room and head straight across the living room, looking down at the notepad by the phone for Memory 4/10 . Examine the phone and enter 026-555-0199 on the keypad for a paper doll to pop out to collect. Look to the left and approach the couch for Memory 5/10 . Go left again and into the small kitchen area, opening the coffee machine and taking the grounds from inside them. Bring the filter left, to the small garbage can next to the fridge. Dispose of the coffee here, going right past the fridge again to find the sink. Take the 4 pots from the sink and place them on the stove to the right. This will make a little paper doll to pop out, be sure to collect it. Take the magazines from the living room table, snack table next to the bird cage, and on top of the toilet tank and bring them to the nightstand to the right of the bed for another paper doll. Return to the bedroom and start placing the pillows on the bed, the goal here is to align the pillows so that their design forms a feather. After moving the pillow on the left, pick up the painting that the pillow was hiding. The pillow under the bed is hiding a trunk, so place the last pillow and collect the paper doll that pops out at the head of the bed. Return to the trunk and examine it, taking the pictures from inside and putting them on the poster board to your left, also taking the paper doll from in the trunk. Head back to the bathroom and look at the items on the sink. Place the feminine items in the left drawer and the masculine items in the right. A paper doll will float down in front of the mirror for you to collect. Go back to the living room and go right, interacting with the bird and picking up the painting from the shelf here. Turn around and take the last paper doll from the mail slot. Now this is the only level you"ll need to play in Advanced twice, as putting the dolls in a certain order can give you one of two memories and you can only do one order per playthrough. For Memory 6/10 put the orange/blue suit on blue doll, the orange suit on the purple doll, blue suit on orange doll and white suit on green doll. For Memory 7/10 , put the blue suit on the green doll, orange and blue suit on orange doll, orange suit on blue doll, and the white suit on the purple doll. Whichever path you choose, the front door opens and allows you to walk to the end and collect a painting before opening the door and being back in the apartment.
Return to the bathroom on the right and put the items in their proper place again. Take the magazines from the living room back into the bedroom once again, putting the pillows back onto the bed and opening the trunk for a painting. The 4 pillows may be in different places around the room, in addition to a magazine being in the bedroom instead of the bathroom. Go back to the kitchen sink to collect a painting and place the pots back onto the stove. Turn around and look in the coffee machine again, taking the grounds and putting them in the garbage can next to the fridge. This will cause a sharp change to the environment, return to the bathroom and pick up the painting from the front of the mirror. Go back into the living room, through the front door, to the end of the hallway and exiting this door to return to the apartment once again.
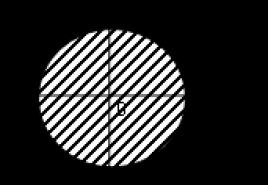
Go into the bedroom and examine the mirror on the left for Memory 8/10 . Take the trunk out from under the bed, it"ll fly to the left and open. This will start a puzzle sequence that could potentially glitch. If you don"t have enough pieces in the trunk, you"ll unfortunately have to hit the reset figure on the right. The puzzle is to construct the door frame properly, since the pieces are hard to describe and the puzzle is rather easy to solve you can do it with a bit of matching and common sense. Thanks to , we have a picture of how the finished puzzle should look.
After constructing the doorway, proceed through it and you"ll enter a room surrounded by mirrors. The correct ones to walk into are "You", followed by "You Are" and ending with "You Are Beauty". After this, retrieve the painting from the end of the hall and enter the door here. Back in the apartment, go to here the coffee machine used to be for Memory 9/10 and take the painting from the table. Go into the bedroom and look at the pillows for Memory 10/10 before going through the rocket ship door you first came through when entering the apartment for the first time. At the end of the starry hallway, go through the doors and down the stairs until you reach the area to sort the memories. Start off with bottom far right picture, "I found someone who I thought loved me". Next up is bottom middle, "There were constant suggestions to make us better". Third, we have the top row on the far right, "Suggestions became demands". This is followed by the 2nd from the left on the bottom row, "My love found strength in my anger". Last will be the 2nd from the left on the top row, "It killed the innocence". This will end the final chapter and earn you:
Now play through once more on Advanced for the first 9 memories, then once more through for the final one to get you:
Congratulations on completing Nevermind!
This walkthrough is the property of сайт. This walkthrough and any content included may not be reproduced without written permission. сайт and its users have no affiliation with any of this game"s creators or copyright holders and any trademarks used herein belong to their respective owners.
Прохождение актуально для всех версий игры
Управление
Примечание. С элементами управления игры можно ознакомиться в начальной стадии игры, где дается подробная информация по способам управления перемещением и взаимодействием с объектами и предметами.
Меню игры вызывается в процессе прохождения нажатием клавиши Esc . Оно имеет пять опций, с помощью которых можно:
- Выбрать язык («Язык»);
- Задать параметры мыши: инвертировать ее по оси Y и отрегулировать чувствительность («Ввод»);
- Отследить данные пульсометра («Датчик»);
- Отрегулировать звук и включить или выключить субтитры («Звук»);
- Настроить параметры графики («Графика»).
Инвентарь в игре не используется.
Сохранение прогресса в игре происходит автоматически при прохождении контрольных точек и при выходе из игры. Cейв вида GA archive располагается по адресу (для Windows 7 ):
C → Users → User (или присвоенное имя пользователя) → AppData (скрытая папка) → Roaming → Steam → CODEX → 342260 → remote .
Примечание . Для увеличения скриншота кликните по нему в тексте прохождения.
Настраиваем яркость своего монитора по предлагаемой таблице. Читаем устрашающую информацию об игре и, с замиранием сердца, входим в коридор «The Neurostalgia Institute».
Пролог

Проходим вперед, сворачиваем влево.

Приближаемся к одной из трех панелей регистрации.

Вводим имя профиля, под которым будем проходить игру. Разворачиваемся, движемся дальше вперед. Сворачиваем направо, проходим через турникет. Следуем в дверь с надписью Staff Only . Проходим по коридору, открываем дверь в его противоположном конце.

Спускаемся по лесенке, открываем дверь, рядом с которой гордо красуется табличка с выбранным нами именем. В комнате приближаемся к панели на стене слева.

Выбираем первого пациента - «Тренинг» (единственный пациент, доступный на начальном этапе). Заходим в дверь справа. Входим в кабину перемещения в память пациента.

Прослушиваем запись воспоминаний, в которых пациент рассказывает о пережитых со своей сестрой тяжелых временах, когда отец привел в семью мачеху.
Глава первая: Тренинг
Коттедж

Оказываемся в коридоре, где находится облачко диалога «Приветствие».
Примечание. Чтобы пропустить фразу в рассказе инструктора, следует нажать правую клавишу мыши (ПКМ).
Проходим вперед, открываем высокую дверь.

Находимся во дворе домика, который виднеется в глубине локации. По пути следования к домику периодически появляются новые облачка диалога, дающие информацию об игре.

Возле облачка «Взаимодействуйте с окружающим миром» лежит батон хлеба.

Поднимаем его, щелкнув левой клавишей мыши (ЛКМ). Зажимаем правую клавишу, вращаем предмет, рассматриваем батон со всех сторон. Опускаем его на землю повторным щелчком левой клавишей. Таким же образом изучаем игрушечный кораблик и пирожное, лежащие поодаль на тропинке.

Переходим к появившемуся рядом облачку «Памятные фотографии». Прослушав инструктаж, щелкаем по лежащей рядом фотографии (1/10 ).

Фотография автоматически перемещается на деревянный щит слева. Нам необходимо собрать десять таких фотографий, чтобы интерпретировать моменты памяти, обнаруженные в психике пациента. Переходим к новому появившемуся облачку, узнаем о необходимости проверки подлинности фотографий. Из десяти собранных снимков, нам требуется отобрать пять фотографий, реально представляющих травму пациента.

Читаем записку, приколотую к двери дома. Подбираем фотографию (2/10 ) у игрушечной лошадки – качалки. Слушаем информацию облачка «Ищите памятные фотографии». Оборачиваемся.

Следуем к новому облачку «Изменение рассудка», появившемуся возле центральных ворот в восточной ограде двора. Проходим по узкому коридору, открываем вторую дверь. Выходим в лес кукол.
Лес кукол

Подбираем фотографию (3/10 ), лежащую на камне. Получаем информацию из облачка «Сохраняйете спокойствие».

Движемся вперед по тропинке. При этом ориентируемся на камешки, которые оставляли пациент и его сестра, чтобы не затеряться в лесу.

Выходим к облачку «Головоломки для нейроисследователя». Получив информацию, взаимодействуем с головоломкой слева.

Размещаем цветные камешки в клювы птиц, имеющих такой же цвет глаз, как и цвет камушка. Забираем, ставшую доступной фотографию (4/10 ).

Оборачиваемся, направляемся к воротам сзади.

Идем по тропинке, все так же ориентируясь на камешки. Проходим через калитку низкой ограды.

Входим непосредственно в жуткий кукольный лес. Следуя изгибам тропинки, выходим к фотографии (5/10 ).
Забираем ее, движемся вперед. Проходим мимо облачка «Сделайте перерыв». Продолжаем двигаться вперед по тропинке, выходим к воротам. Открываем их, попадаем на локацию «Коттедж». Замечаем, что открыты дальние ворота. Заходим в них.
Коттедж
Сначала идёт система обучения. Вы узнаете, как сделать первые шаги в игре. Подходите к облаку советов, которое будет выделено синим цветом. Читайте то, что вам нужно сделать, и ищите фотографии. Если не хотите проходить обучение, то можете щёлкнуть правой кнопкой мыши, чтобы его пропустить.
Спуститесь по коридору и откройте дверь в конце. Вы должны попасть в сад с домом в другом конце. С правой стороны расположено три двери. Двигайтесь вперёд, вы должны увидеть деревянный стенд, на котором появляются найденные вами фотографии с воспоминаниями. Ниже стенда должна валяться первая фотография (1/10).
Сделайте несколько шагов назад к дому и найдите на земле вторую фотографию (2/10), лежащую около игрушечной лошадки. Подойдите к средней двери из трёх справа (слева, если стоять спиной к дому), и пройдите через неё в лес (кукольный).
Кукольный лес
Сразу после входа с правой стороны на пне можно найти фотографию (3/10). Заберите её.
Идите дальше и вскоре увидите первую головоломку, которую нужно решить. Вы должны вставить камушки разных цветов в клюв птиц. Слева – белый камушек, посередине – синий камушек, справа – розовый камушек. Как вы уже догадались, цвет камня зависит от цвета глаз. Заберите следующую фотографию (4/10).
Двигайтесь через другую дверь, ведущую в жуткий кукольный лес. В конце леса будет находиться пятая фотография (5/10), недалеко от подсказки «На мгновение задержаться».
Путь вперёд приведёт вас к двери, через которую вы сможете покинуть лес и вернуться к коттеджу. Открыта левая из трёх дверей. Пройдите через неё, чтобы попасть в другую часть леса.
Лес (лабиринт)
Здесь будет лабиринт, который может изменяться. Сначала следуйте в левую сторону до статуи совы. Там же должен стоять стол с тарелкой, а незадолго до него – на полу валяется хлеб. Поднимите блок хлеба и положите его на тарелку. Погаснет свет и лабиринт должен измениться.
Повернитесь и идите назад. Пройдите по мостику. Следуйте вперёд, направо мимо деревянной лошадки и налево, вглубь леса. Здесь будет статуя кролика. Вы должны опять же найти хлеб и поместить его на тарелку. Вновь лабиринт изменится.
Двигайтесь по прямому маршруту, пока не увидите статую белки. Найдите хлеб и поставьте его на тарелку. Пойдёт снег.
Найдите статую кролика без головы и хлеб неподалёку. Дальше будет алтарь со статуей лягушки. Поставьте хлеб на тарелку перед лягушкой. Снег пройдёт, вам придётся идти по дороге вперёд, пока не увидите подвесной мост. На столбике слева перед мостом должна быть шестая фотография (6/10).
Направляйтесь по мосту. Здесь будет несколько мостиков. После третьего мостика на дереве найдите седьмую фотографию (7/10), на этот раз на столбике справа.
Тропинка приведёт вас к пряничному домику. Перед тем, как в него войти, найдите на картине восьмую фотографию (8/10).
Зайдите внутрь дома.
Пряничный домик
Двигайтесь вперёд. Уворачивайтесь от зубов и шипов, которые могут появляться из-под земли. В конце дома вы должны увидеть печку, внутри которой находится фотография. Нажмите на фотографию и вас туда телепортируют. Нажмите на руку, которая будет появляться с разных стороны. Вы телепортируетесь на следующую локацию с лодкой.
Лодка
Здесь вы найдёте очередную фотографию , которая была видна в камине (9/10). Садитесь в лодку и наслаждайтесь короткой поездкой на другой берег. Там вы доберётесь до хижины. Около красного рояля напротив дверного проёма, на земле должна валяться последняя фотография (10/10).
Диагноз и лечение
Итак, вы вернулись к стенду со всеми фотографиями. Щёлкните по ним. Вам нужно найти пять правильных фотографий, которые соответствуют фоновой истории. Решение данной задачи будет таким:
- Пронумеруйте два ряда так: верхний слева направо от 1 до 5, а нижний слева направо от 6 до 10.
- Выберите следующие фотографии: №2, №7, №10, №6, №3.
Расширенное нейрокартирование (Тренинг)
Подойдите к монитору и вновь выберите «Тренинг». Выберите «Расширенное нейрокартирование».
Все эти предметы нужно искать параллельно с поиском фотографий!!! Если вы их не нашли, то сбросьте прогресс исследования и повторите уровень заново. Следуйте инструкциям ниже.
Ниже вы можете увидеть 11 объектов, которые указывают на то, какая психологическая травма была нанесена пациенту. Все они должны быть найдены и изучены. Не все исчезнут с локации (в левом нижнем углу экрана должен появляться значок «мозга», что означает то, что вы нашли один из предметов).
На локации с коттеджем между буханкой хлеба и игрушечной лошадкой около коттеджа, прямо на тропинке вы можете найти кораблик. Щёлкните по нему и осмотрите. Положите на место.

На двери коттеджа висит записка. Заберите её.

Когда вы в лесу доберётесь до жуткого места с куклами на деревьях, то у подножия третьего дерева вы можете найти череп с ножом.

После того, как вы выполните действия около статуи совы, то пройдите через мост и сверните направо. Нажмите на любую клавишу маленького красного рояля с буквой G.

Опять же в лабиринте, когда вы доберётесь до подвесного моста, слева должны обнаружить спуск вниз. Есть широкая площадь внизу. Справа вы должны отыскать валяющийся на земле череп. Возьмите его в руки и поверните так, чтобы прочитать надпись: «Help Us». Должно сработать автосохранение.

Под подвесным мостом вы можете найти ещё один мост через реку. Пересеките этот мост и увидите домик. Подойдите к нему и посмотрите на дверь.

После того, как вы пройдёте по подвесному мосту, держитесь левой стороны и найдёте пирожное около костей. Подберите его, поверните и найдите рисунок красного сердца.

Прежде, чем добраться до пряничного домика, вы должны обнаружить дерево огромного диаметра, с левой стороны. В него воткнут топор.